
Step 1
Create your hub
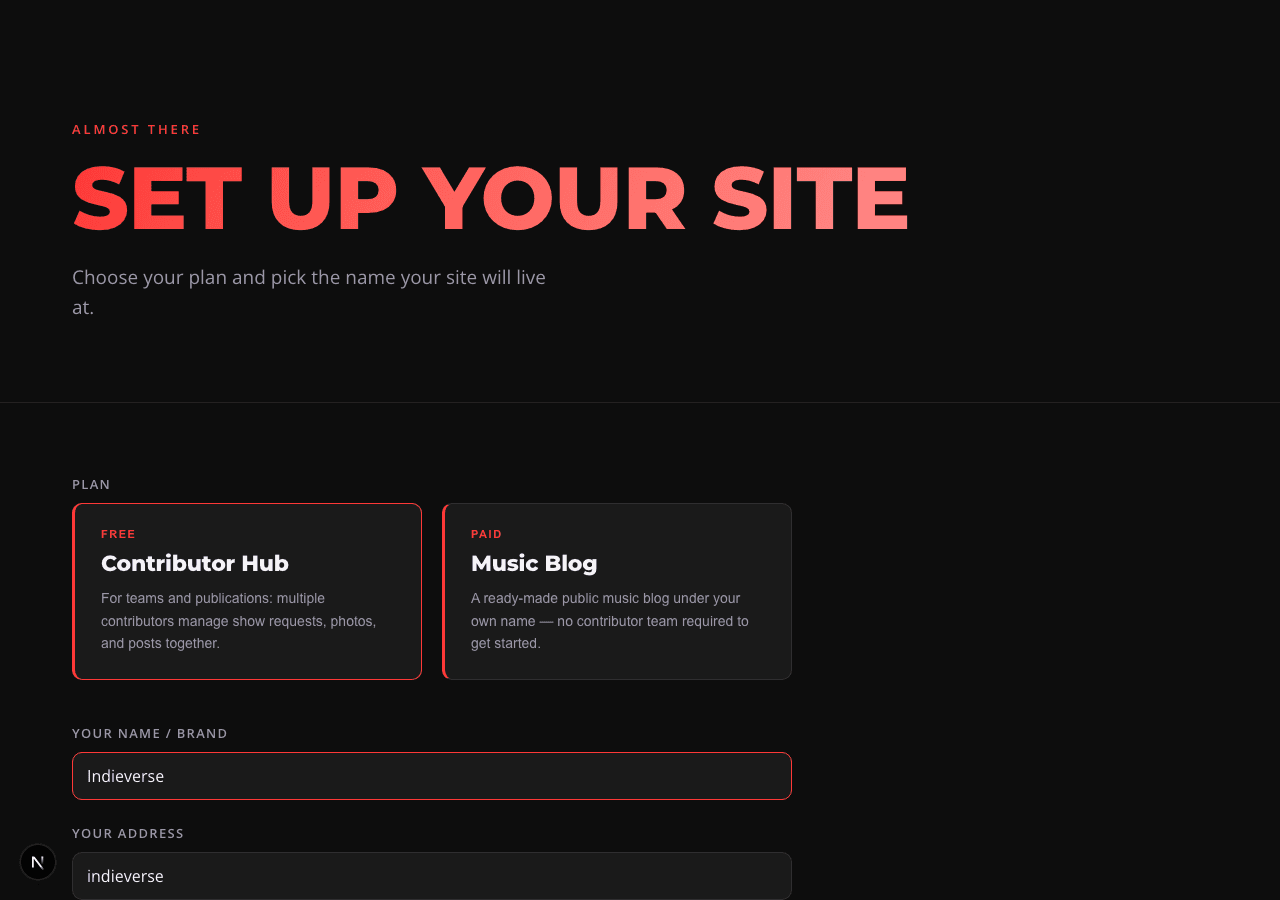
Sign up and pick a name for your hub – it becomes yourname.zinery.co, your team's own address. It's free to start and there's no credit card required.
You land as the hub's admin, which means you're the one who invites contributors, approves requests, and configures the hub itself.
Step 2
Get oriented on your dashboard
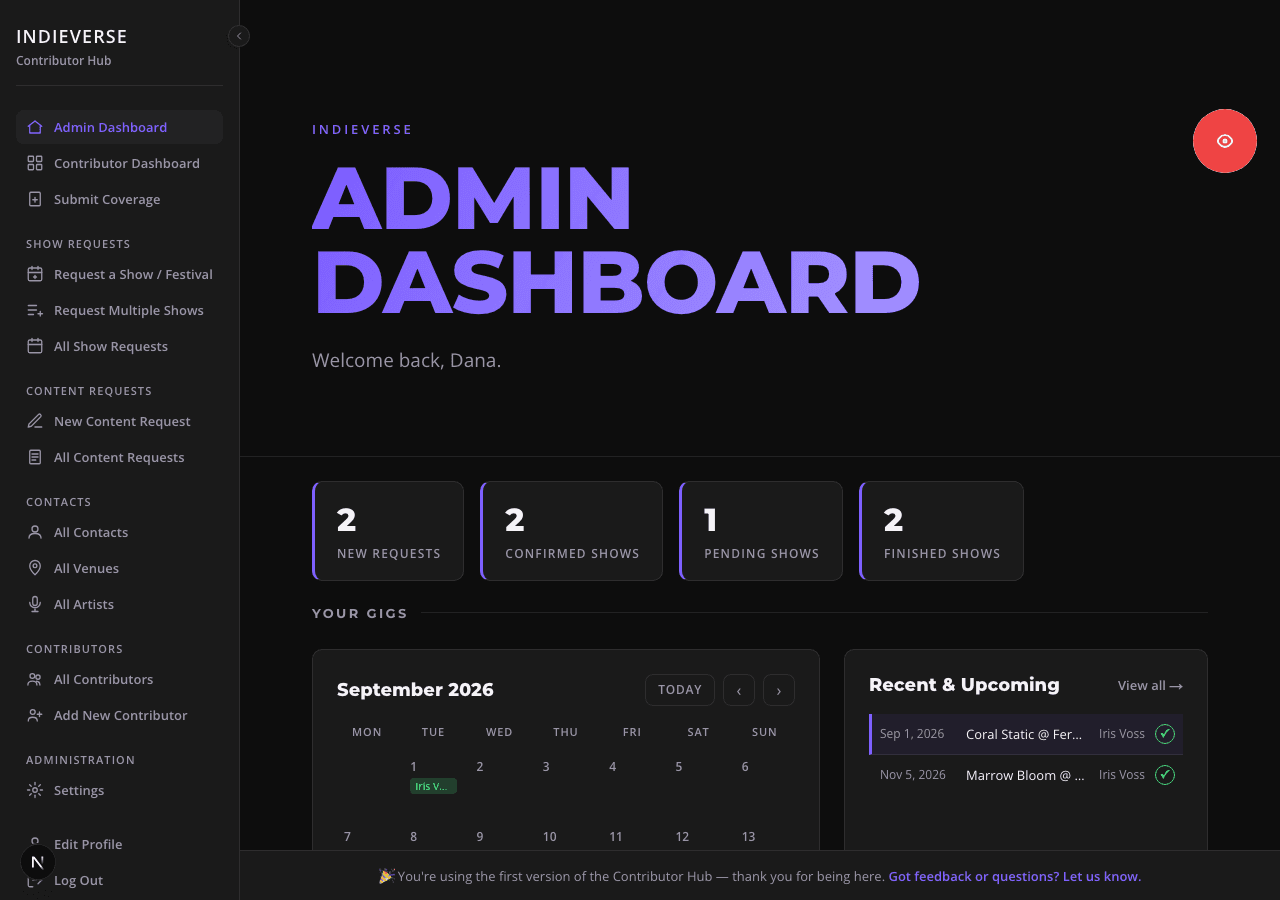
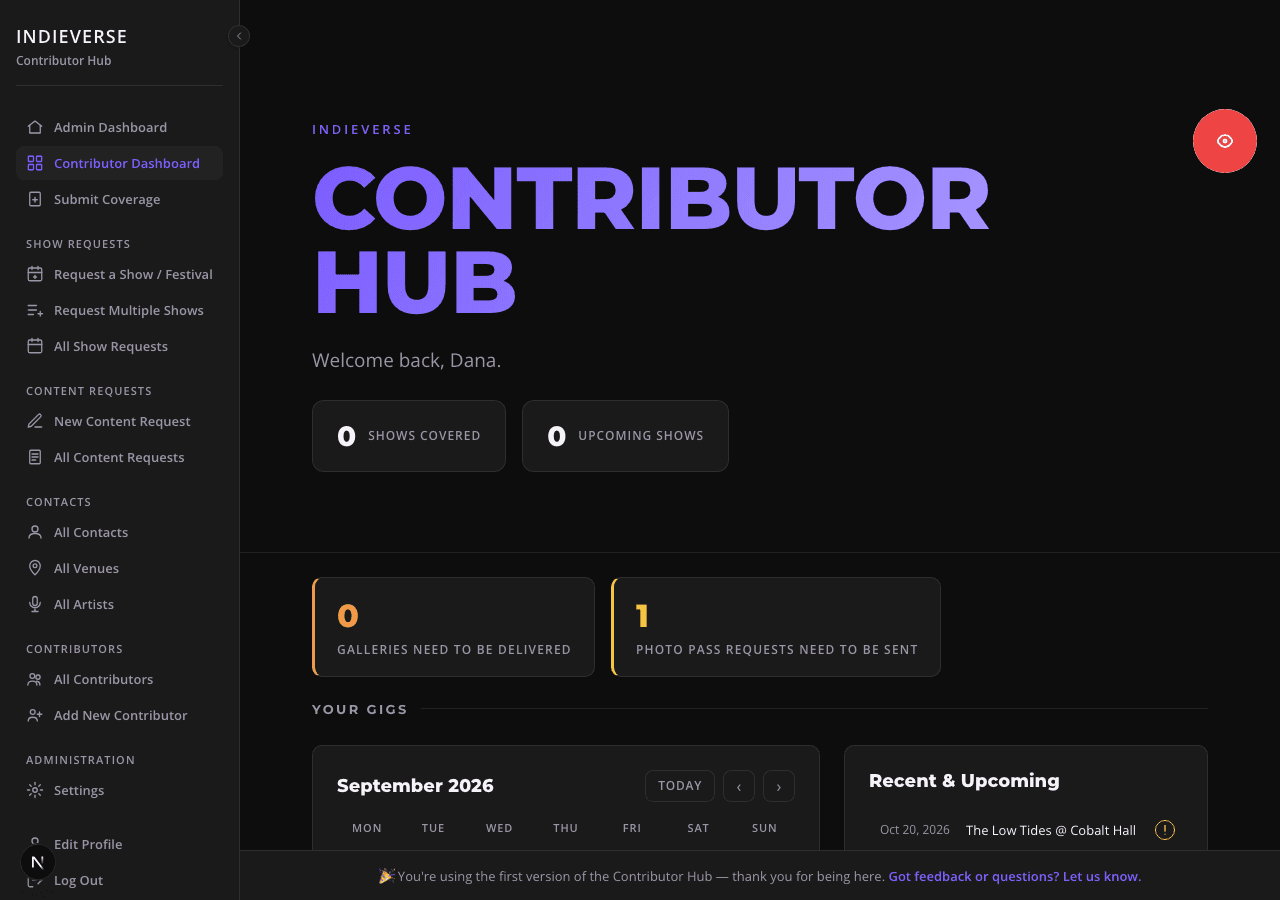
The dashboard is the home base – both for you and for every contributor you invite. It's a calendar of upcoming shows, a handful of key figures (open photo pass requests, galleries to deliver, upcoming events), and a list of new show and content requests.
As admin, you see everyone's requests and events here by default. A toggle switches you to your own contributor view any time, and back.
Step 3
Invite your contributors
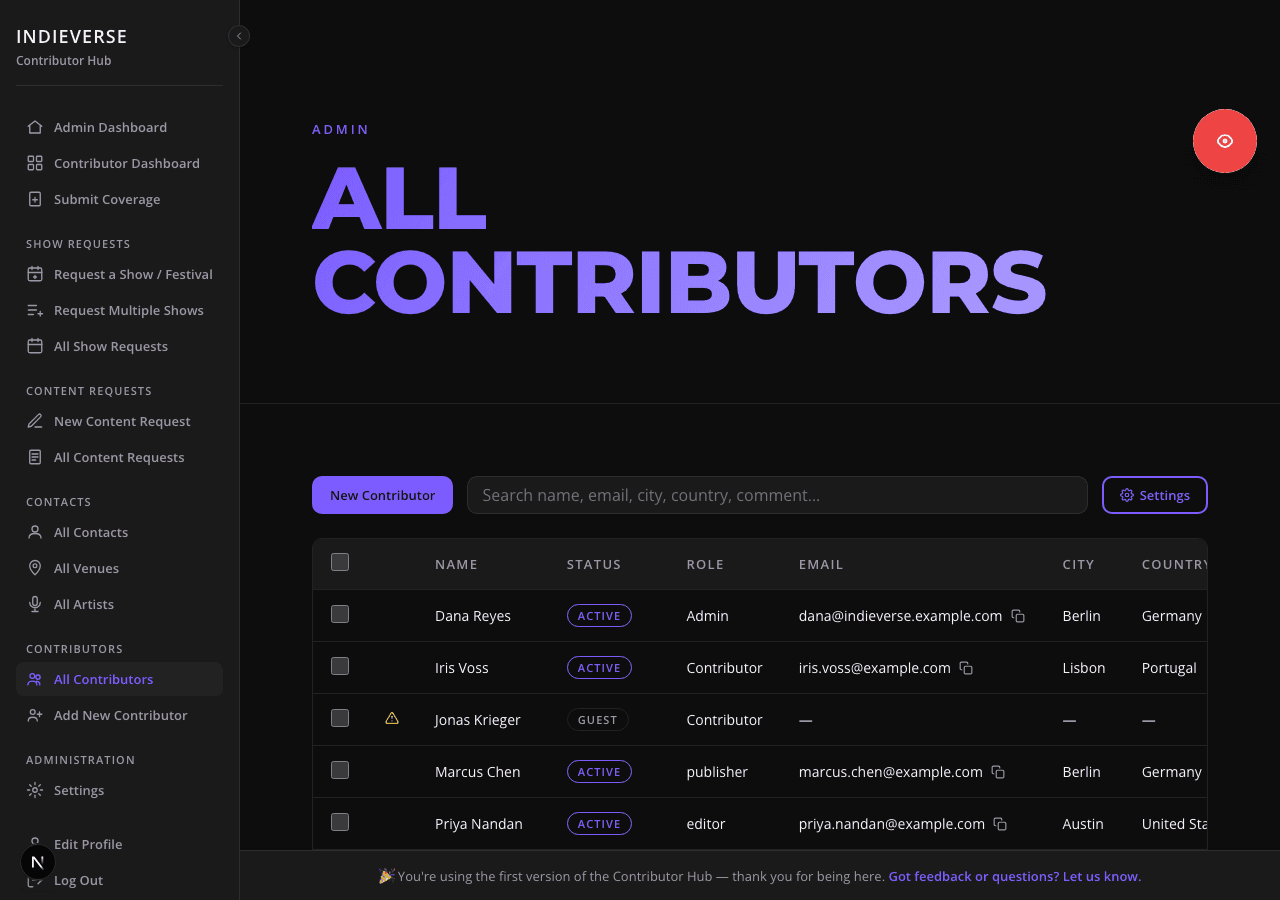
Add writers and photographers by email. They get an invite, sign up, and land straight in your hub – no separate accounts or passwords for you to hand out.
You can also add a guest byline for someone with no account of their own – useful for a one-off contributor you still want credited on a post.
Every contributor gets one of four roles, which decide what they can do with posts:
- Contributor – requests coverage; no post access.
- Editor – can draft posts, and edit or archive their own drafts.
- Publisher – can create, edit, archive, and publish any contributor's post.
- Admin – everything a publisher can do, plus approvals, team management, and hub settings.
Editor and publisher become selectable the moment the music blog plan is added to your hub. Until then, every contributor is either contributor or admin.
Step 4
Approve show & festival requests
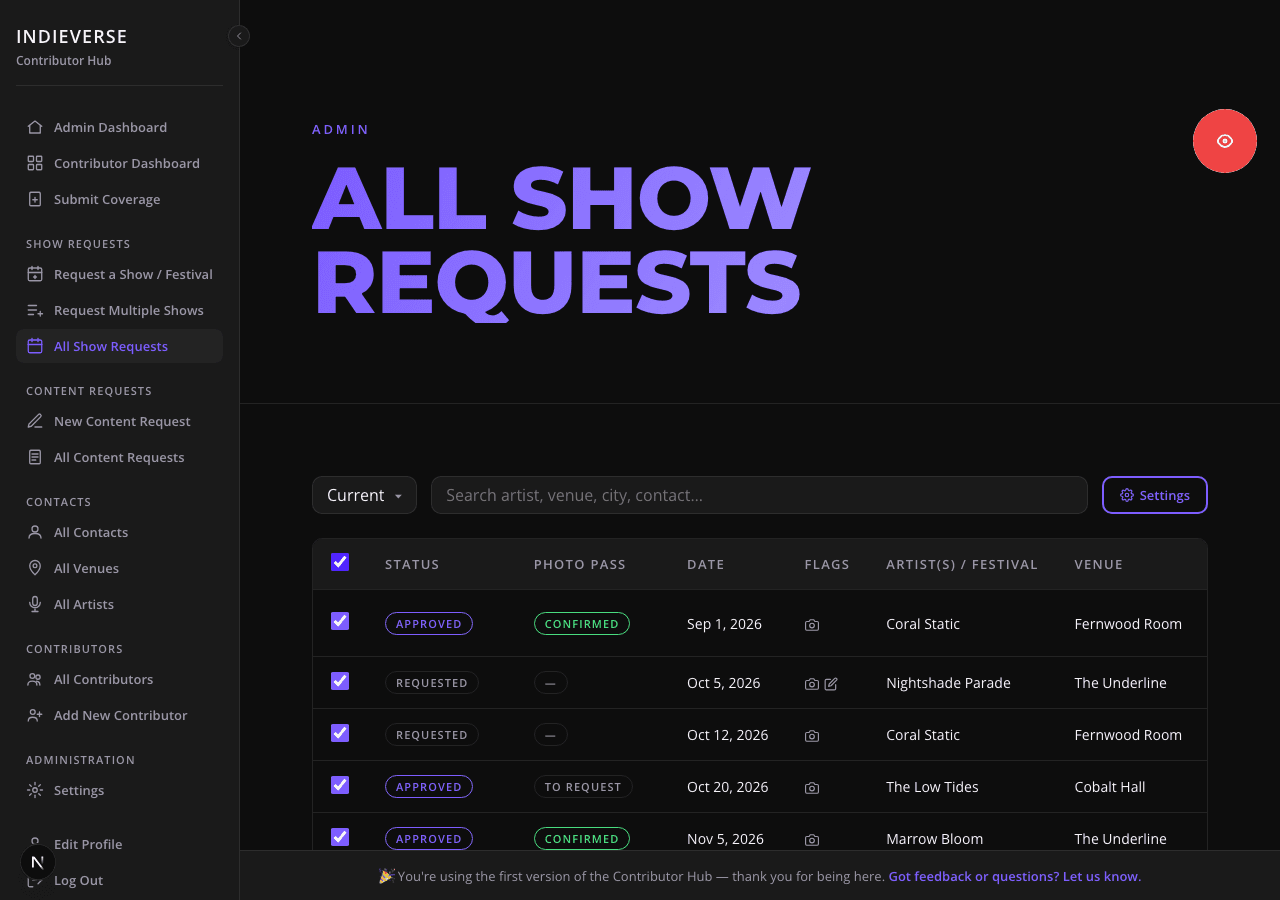
A contributor requests coverage – date, artist(s), venue, and whether they want a photo and/or review pass. Artist and venue fields autocomplete, and a new name is created automatically if it doesn't exist yet.
Every request lands in your hub, where you can approve or decline it, filter and sort the table however you like, and act on several requests at once with bulk selection.
A request moves through a simple lifecycle: requested, then approved or declined. Once approved, a photo pass can be marked confirmed or denied, and once the show has happened, you mark the whole thing delivered, published, or done.
Step 5
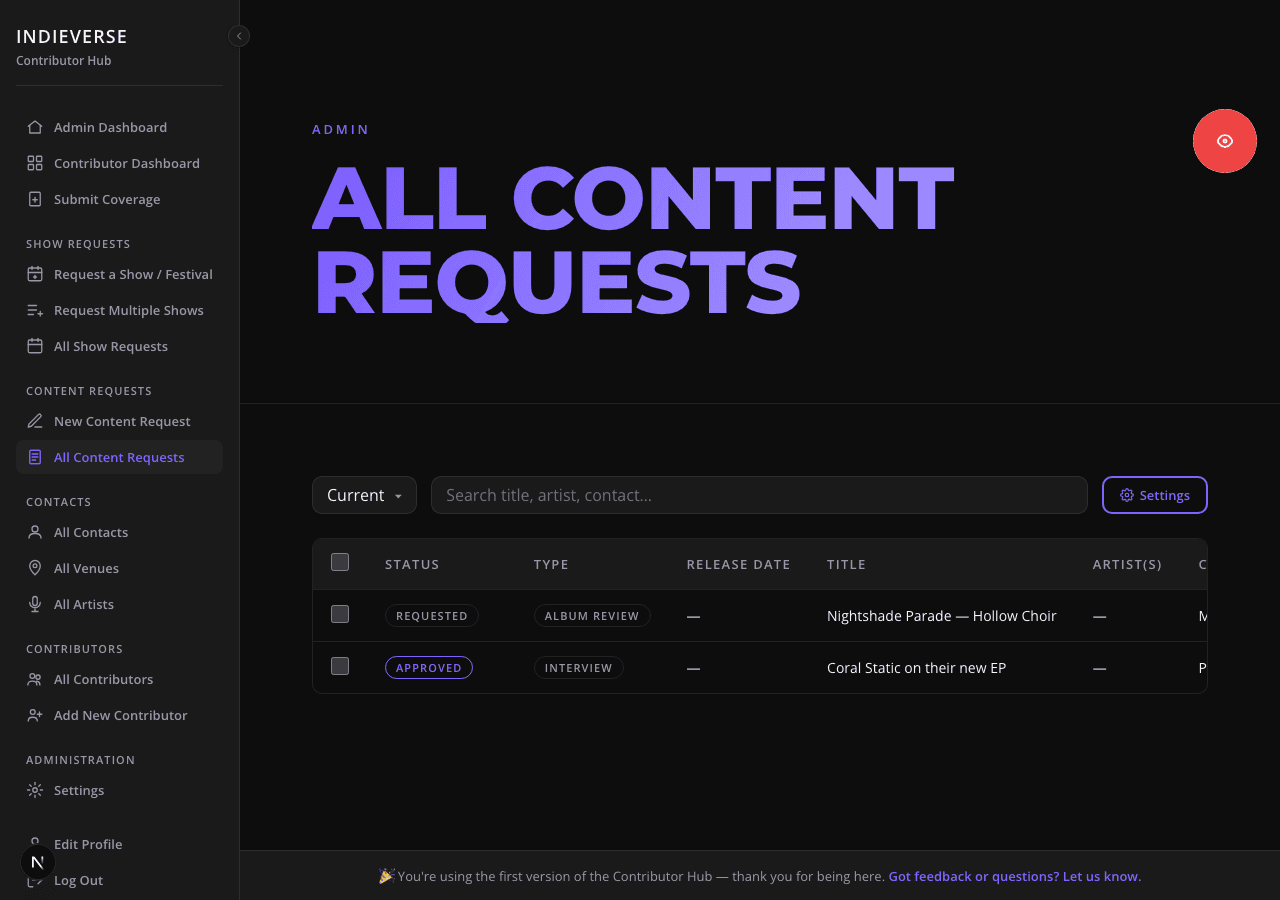
Handle content requests
Not every pitch is tied to a live show. Content requests cover album or single reviews, interviews, and other features a contributor wants to write about.
Step 6
Track photo passes
Once a show request is approved, the photo pass status can be set to confirmed or denied — by the contributor who owns it, or by you.
Step 7
Keep contacts organized
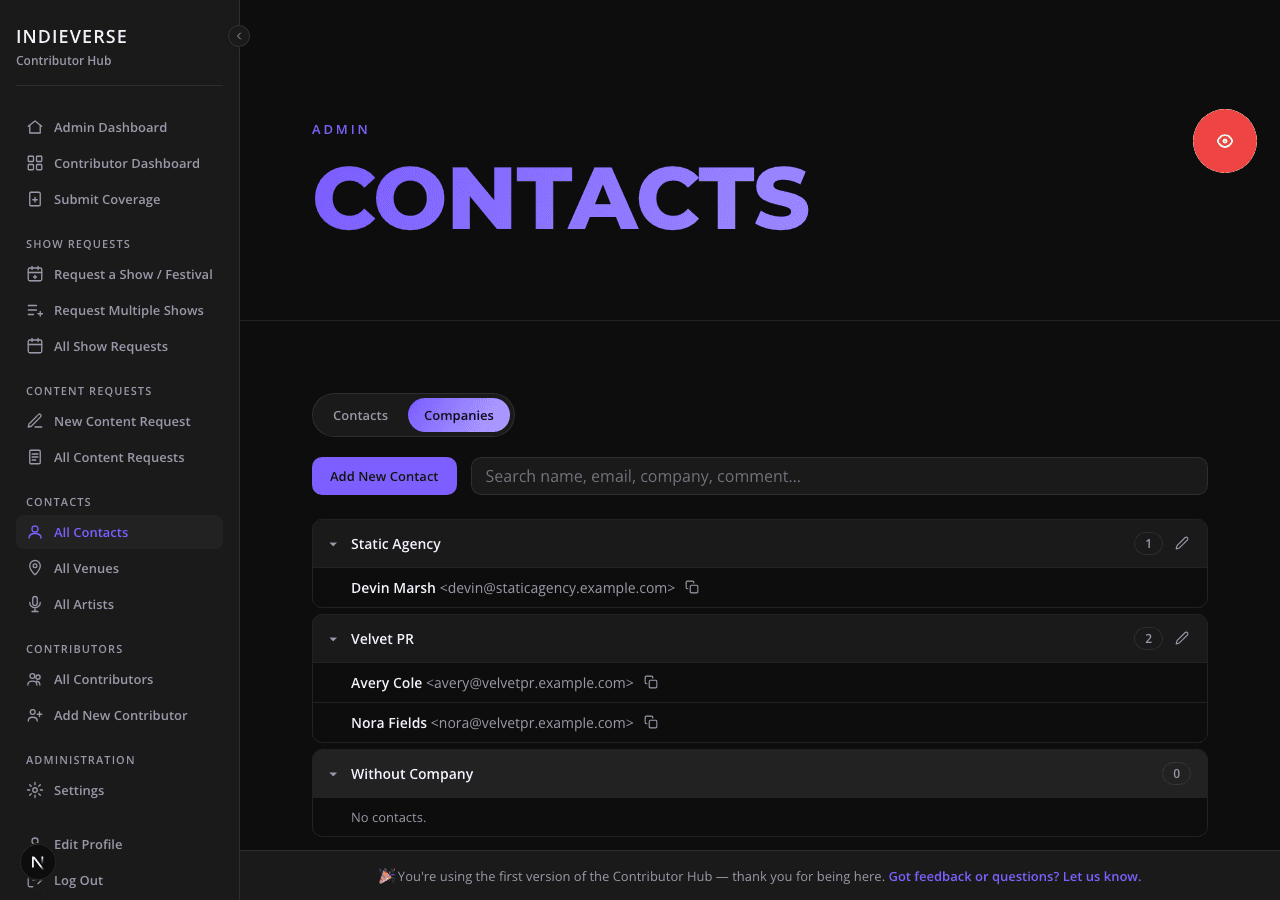
Press, venue, and other industry contacts live in one searchable directory, organized by company.
Contacts link directly to the events they relate to, so when you're looking at a show, the right person to reach out to is right there.
Step 8
Coming soonPublish the coverage
Once the music blog plan is available and added to your hub, you and your contributors can create posts directly within the hub.
Linking a post to the event it covers auto-generates a one-line summary – artist, venue, city, date, and photo credits – shown right alongside the post, so there's less to write by hand.
This step and the next few are part of Music Blog, an add-on for the same hub — same account, nothing to migrate once it's available.
Step 9
Coming soonEvery teammate gets the same writing tools
Any editor or publisher on your team writes in a distraction-free, full-screen page — just a title, a short description, and the body, with a small format menu that appears right where they're typing instead of a cluttered toolbar.
Step 10
Coming soonPhotos, galleries, and embeds, handled
Typing /photo drops in a single image; /gallery on a post linked to a show pulls in every photo already uploaded for that event at once, titled and ready to trim — no downloading and re-uploading what a photographer already delivered.
A pasted YouTube, Spotify, Bandcamp, or SoundCloud link becomes a real embed, and a post can link to another one on your own site with a proper preview card instead of a bare URL.
Step 11
Coming soonWhat readers see
Every photo opens full-size in a lightbox with a single click.
Every byline is a link — readers land on the writer or photographer's own public page, credited automatically, no manual linking required.
Step 12
Coming soonBuilt-in SEO, out of the box
Every published post carries its own structured data – schema.org markup for the article itself, and for the event, artist, and venue too once it's linked to a show – plus canonical, Open Graph, and Twitter card tags, all generated automatically. Nothing to configure by hand.
Step 13
Make the hub yours
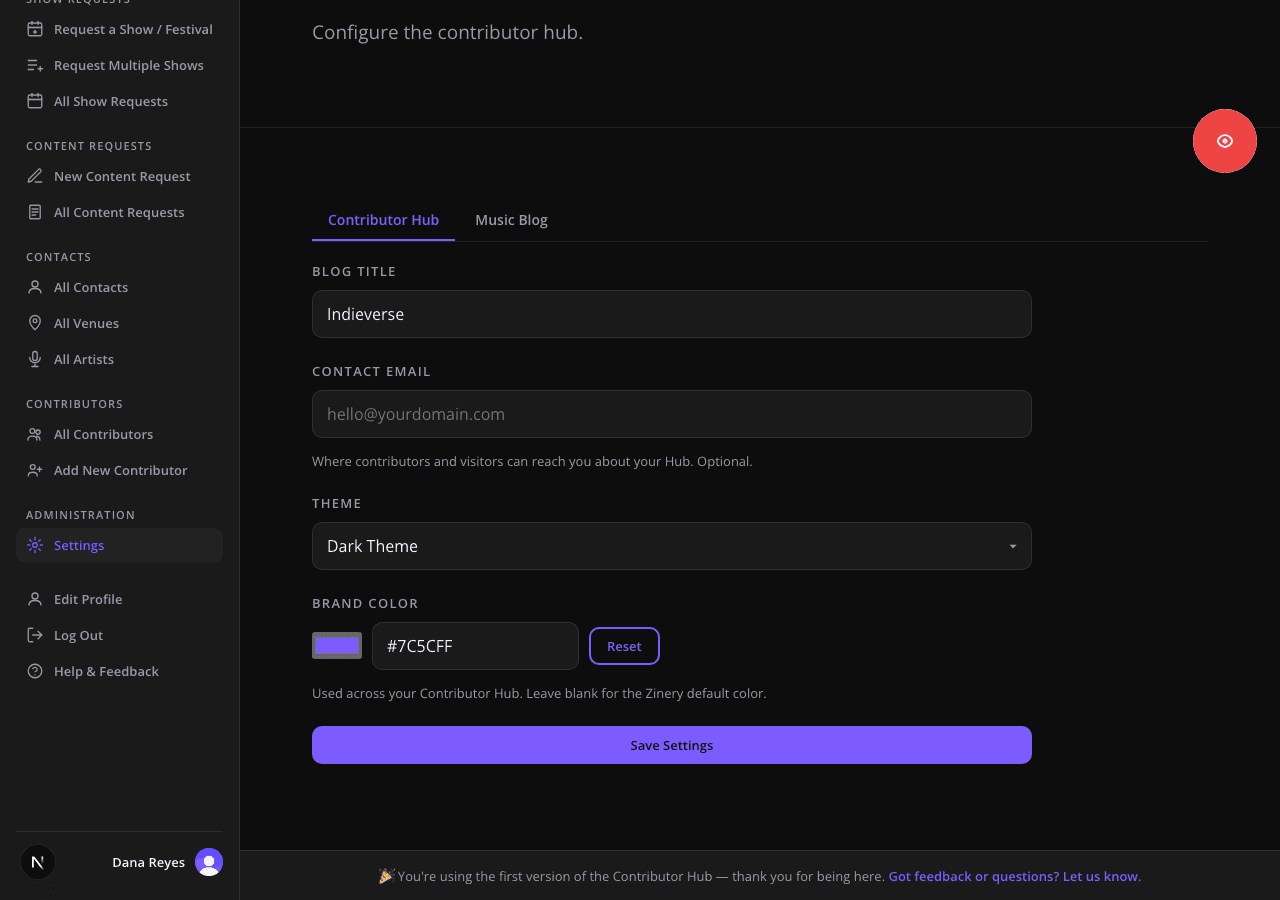
Set your hub's title, description, theme (dark or bright), brand color, and social links – everything that makes the subdomain feel like your publication rather than a generic tool.
Give your contributors a home
Everything above except the publishing tool is included from the moment you sign up — no credit card, no setup call. Music Blog slots into the same hub the moment it ships, nothing to redo.